Wednesday, April 16, 2014

Cheesy Mac N Ground Beef Casserole


Around the house, this is simply known as "Casserole," because at the time I threw it together and had no idea what else to call it.  Also, I'd never made an actual casserole, and this was just the kind of night that had "seeking comfort" stamped all over it.  That was years ago, and this is, believe it or not, one of the few dishes that I make that my mister actually requests from time to time-though he keeps trying to connive me into putting sausage in it instead...well, that's another thing.

This is a great one dish meal, and I tell myself that really, it's not totally un-healthy, but really, you've got to go for it from time to time.  It's really a very simple thing to throw together, and works fine made a day in advance too.  My only regret was not taking a picture of the cooked end product, I'll just let you use your imagination...think ooey-gooey-cheesey-molten deliciousness.  Or better yet, try this recipe yourself, it has a little kick in it.

Uncooked, before the blanket of cheese...


Here's what you need:
1 box of your favorite macaroni and cheese
1/2-3/4 # ground beef (80/20 OK)
1 larger sized can of crushed tomatoes
1 green pepper, coarsely chopped
1 med/lrg onion, coarsely chopped
2 T oil (canola fine)
1/4 cup milk (for the mac n cheese, as directed)
2 T margarine (for the mac n cheese, as directed)
1/4 cup Louisiana hot sauce
1 1/2 cups shredded cheddar cheese

Here's what to do:
Boil and prepare the macaroni and cheese as directed by the box
(includes ingredients for Kraft's version listed above as 2 T margarine and 1/4 C milk)
Using a large mixing bowl to stir in the seasoning, milk, margarine
In a skillet, heat 1 Tbs oil, saute the chopped onion, just until tender, then add it to the bowl
Heat other Tbs oil, saute the chopped green pepper, also until tender, and add it to the bowl
Brown the meat in the skillet, until fully cooked, add to the bowl
Add the can of crushed tomatoes and the 1/4 C of Louisiana hot sauce to the bowl and stir it all together.

Grease with margarine the sides and bottom of a 9 x 13 glass baking dish
Spread the mixture into the dish
Sprinkle with shredded cheddar cheese
Cover with aluminum foil

Uncooked, before covering with foil


At this point, you can either refrigerate this until you are ready, or go ahead and bake at 350 degrees for an hour.  Be sure to let it cool so that you don't burn your mouth on that delectable melted cheese!

It is also very good the next day, even cold...hence the lack of finished product pictures.  Oops.  This will surely feed 3 hungry men for dinner!


Tuesday, March 25, 2014

Spring Cleaning

So I had finally had it with the folded piles of fabric sitting on the setee by the foot of the bed, and determined to clean up this clutter one way or another.  But then I looked in at my sewing corner, and saw such disarray.  Four bags stuffed full and overflowing with leftover fabric, from scraps, to the I'll get on that project and fix it to something useful stages of things no longer worn were hovering in the corner like a looming tower.  Crushing my creative nature, and guilting me every time I bought new fabric.

Enough was enough.
I needed organization.  Order!  A sensible set-up!
I needed....shelves.

However, it is the unfortunate fact that we live in a town without a store selling lumber.  That's right.  You can buy dowel rods at the hardware store and that's about it.  So, after surveying my leftover stash of scrap pieces (now excited by the idea of using up these odds and ends as well), I made a list of what I had and started drawing out a plan. 

Well, after much cutting, sanding and fastening, I was rewarded with moderate success.
I now have a shelf.
And thing look so organized!
This inspired me to clean the whole corner of that room, re-organize, etc.
And one thing led to another and before I knew it, I've even got the leftover fabric rolled, banded and in a designated area.

Whew.
Here is the "after shot" of my efforts...the before shot never happened, and it's just as well-take my word for it.


Now I'm all juiced up for my next project.  The workspace is just begging to be used!


Tuesday, March 18, 2014

Falafel and Tzatziki

Hello reader,

I have been having a blast discovering the joys of pressure cooking dried beans!
It's so much fun, and I love the fact that I don't have to mess around with pre-soaking or anything so time consuming as that.  To help me on my merry way, I found this great website:
http://www.hippressurecooking.com/pressure-cooking-times/

Which has been enormously helpful.  I've cooked great northern beans to make into a lovely dip, or to enjoy with salsa and sour cream over them (really good!), and then I moved on to garbanzo beans (chick peas).  Lately I've been having trouble getting the consistency of hummus that is smooth and rich from using the cheap, pre-cooked canned variety, so this was my next mission...and it worked.  Over cooking the chick peas made them delightful for hummus.  This was the first factor that led me to a dinner of falafel...


The other happened one night during the week, when  I was seeking a creative way to use cauliflower as a side, and found a recipe for cauliflower falafel.  Well, the mister wasn't wild about it, so I saw this as a challenge to find a good recipe for the real deal.

For this, I turned to the well known website by The Shiksa In the Kitchen:

http://theshiksa.com/2011/01/05/falafel/

I read the reviews for this recipe, and went ahead with the pressure cooking of one-half bag of garbanzo beans (one half pound).

I followed the recipe as listed on the site, only adding a touch of tumeric, and set the mixture in the fridge for a few hours.  Unfortunately, it came out with no stick-together at all.
I added flour and worked it.  Not enough.  Added more. Maybe.  Tried it in the heated canola oil....
And it totally fell apart while frying.
Sadness ensued.
Don't give up!  Add more flour and seasoning (because I figured now it was diluted).
And since I threw out the canola oil mess, I went with a skillet and olive oil.

Here is the recipe for the falafel I ended up making:

Ingredients

  • 1/2 pound dry chickpeas/garbanzo beans, pressure cooked
  • 1/2 onion, roughly chopped
  • 1/4 cup chopped fresh parsley
  • 3 cloves garlic
  • 4 T flour
  • 3/4 t salt
  • 2 t cumin
  • 1 t ground coriander
  • 1/4 t black pepper
  • 1/8 t cayenne pepper
  • Pinch tumeric
  • Olive oil for sauteing

Method

Process this mixture in a food processor, but quite before it gets too smooth like hummus, use the pulse!
I made patties out of the mixture by packing a heaping tablespoon against the side of the bowl, and releasing it into the hot oiled skillet with another tablespoon
Browned each side
Set them for 20 seconds on a paper towel to absorb extra oil
Then under a covered plate until they were all done.  I was able to work 4-5 at a time, and they didn't take long to brown.


 The sauce you see was the Tzatziki I made...

Tzatziki is a wonderfully easy and delightfully cool and crisp addition to this meal (and others too).  It emphasizes the falafel in a manner than I doubt anything else can, and so highly recommend making it to go with.

Tzatziki Recipe

Ingredients:
 
1 1/2 C full fat yogurt
3/4 of a large cucumber
2 t dried mint
1 large garlic clove
1 T lemon juice
1/4 t salt

To make:

Peel and seed the cucumber, then chop finely (save the rest of the cucumber for garnish)
Press the garlic clove
Add the yogurt, lemon juice, dried mint, and salt
Stir and refridgerate until ready for use.

*If you happen to not have dried mint, you can use mint from a tea bag instead, just don't use peppermint.

 
One small confession...
I took this picture the next day when I was having the leftovers for lunch, so the falafel was not as crispy.  But it was still delicious!
For dinner I served it with pita pockets, smeared on the inside with hummus, the falafel, cucumber, tomato and onion slices, and of course, the Tzatziki, it was very good.  OH, and a pickle on the side (Kosher dill of course).


Sunday, March 16, 2014

One Apple = Dessert for Two

Ramekin Apple Crisp (for two)

Do you ever end up with one piece of fruit, that just sits there, because there is only one of them?  Have you ever been in a pinch with one apple and a craving for a dessert idea, and wondered, how can I make this stretch for the two of us?  Well, I can tell you one idea...

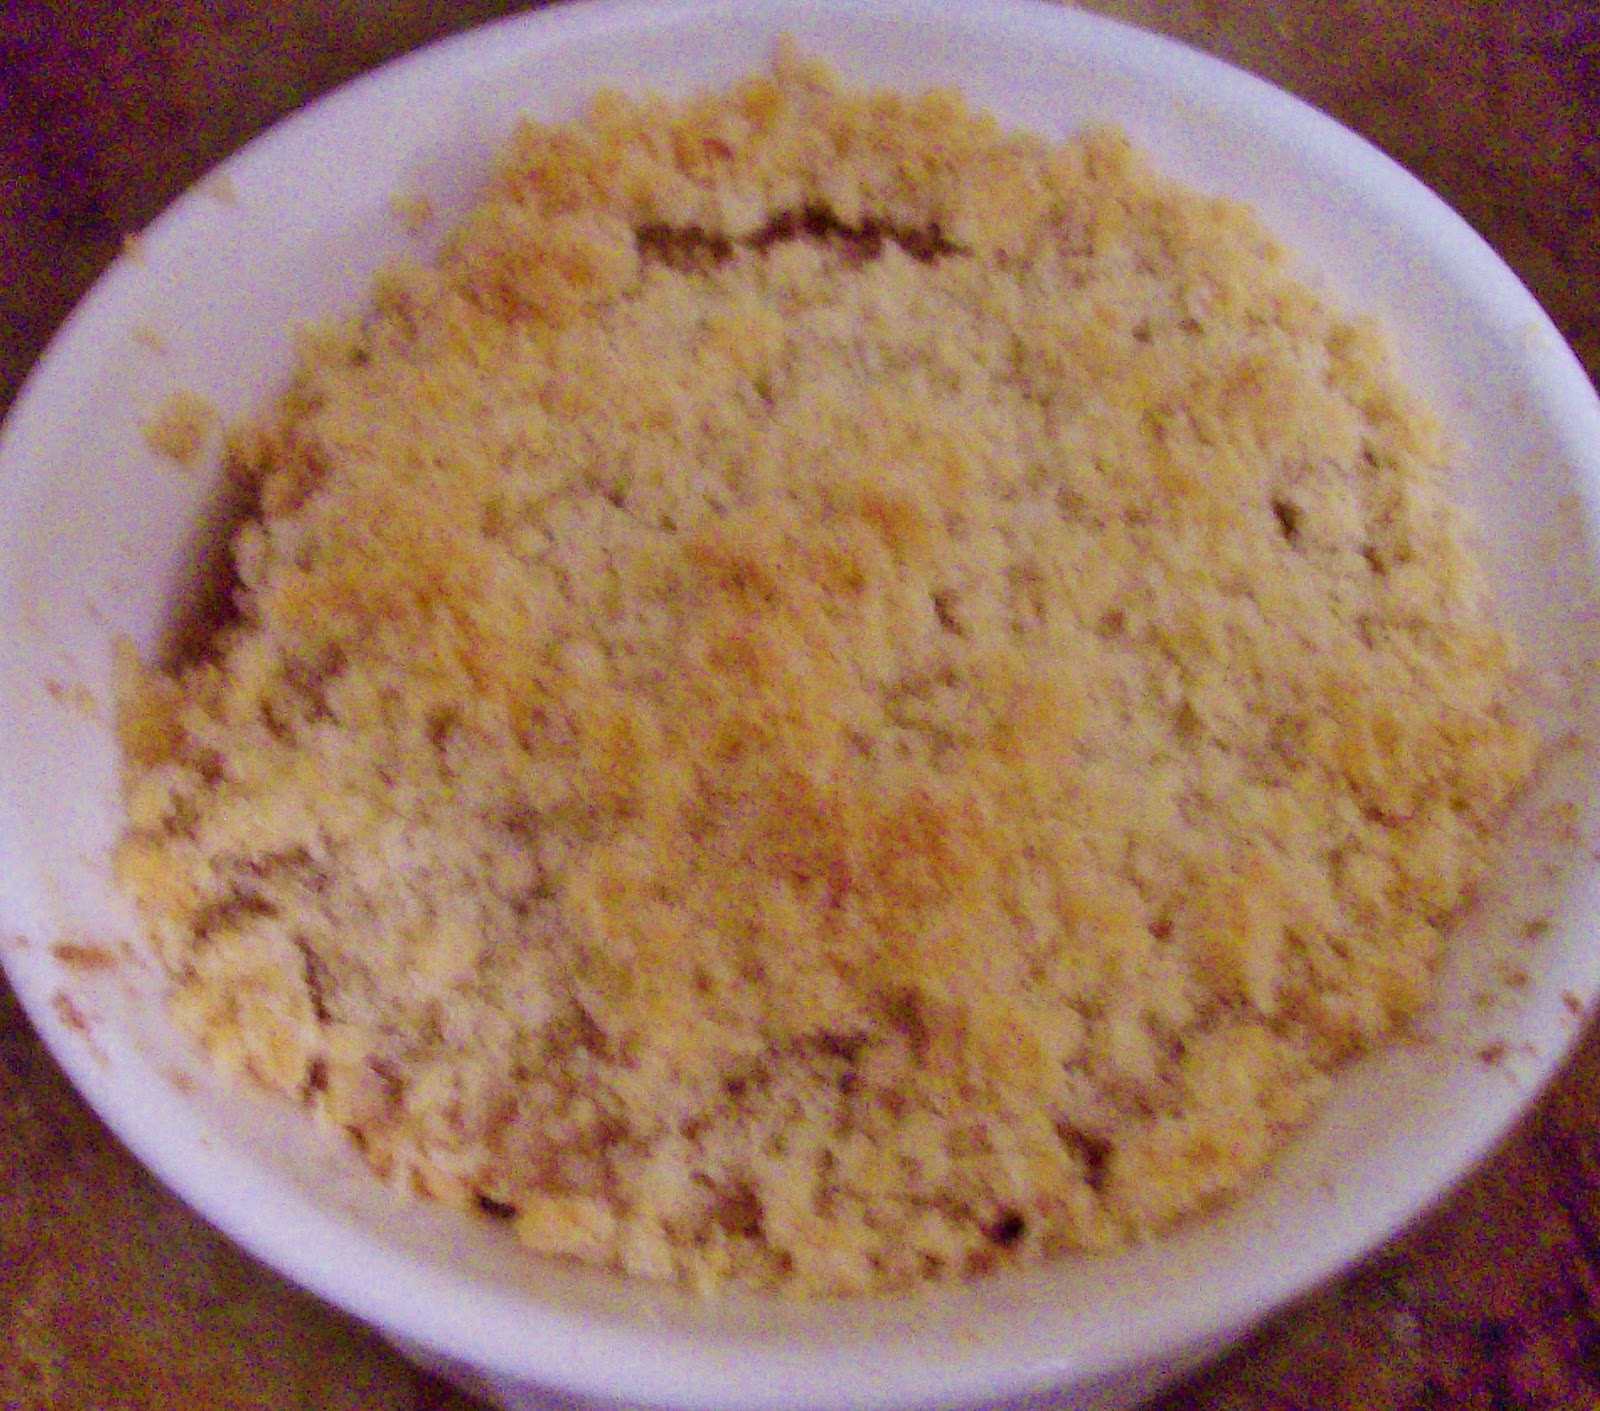
Make some apple crisp in ramekins!  As it turns out, one apple is the perfect size to fill two ramekins, and what better way to use it than to make two perfectly portioned individual desserts?   It takes a fraction of the time, and adds a special touch to the end of dinner.

Here are the instructions:


Preheat your oven to 350 degrees
Wash the apple
Grab the cinnamon
Slice it as you would for a pie or crisp, about an eighth of an inch or slightly thicker, taking out the core
Margarine the sides and bottoms of the ramekins

 
Start placing the apple slices in the ramekin in an even coverage fashion
At halfway up the ramekin, add a dash of cinnamon and continue filling


Add another dash of cinnamon on the top


In a small bowl, combine:
2 T flour
3 T sugar
3/4 T margarine
1/4 t cinnamon

Use a fork or rub the mixture together with your hands until you achieve a coarse crumb consistency and it is even in texture and blended through.


Divide equally and sprinkle over the tops of both ramekins.


Give them a light pat, gently!
And into the oven for about 35 minutes.


The crust should be turning a light golden brown at this point, at which you are done!
Cool for 10 minutes and serve when cool enough to handle.
Vanilla iced cream or frozen yogurt is always a nice addition, but not necessary.

Enjoy!


Thursday, March 13, 2014

McCall's 6802-Blah Cardigan


McCalls 6802

Hmmm.  A disappointment.


And this after I waited so long to get the pattern on sale! 
I had wanted to make a warm, snuggly, throw-it-on cardigan type sweater out of fleece, and had picked view C as the perfect conveyance for my idea.

The fact that it was labeled an easy sew made it all the more meant to be.  That was all in theory, however, not in practice as I soon came to find out.  

From reading other reviews, I gathered that this view was noted for excessive ease, so I decided to cut between the 8 and 10 sizes.  It also appeared that the sleeves were not full length, and that would bother me, so I chose to extend the sleeves in cutting by 5 inches.  The most obvious pointer was to cut the collar on a fold, who needs the extra seam?

So that was the plan.   
Then came the directions… and what a mess.   
They seemed all over the place, and nonsensical.  Instead I followed this chain of events because it made more sense:
Shoulder/upper arm seams
Side seams
Fold pocket top, place, pin, stitch along bottom and top stitch the pocket side near the side seam of the body (stitch fold down on one side, and all the way down, fold under then top stitch side)
Cut neck band on the fold-eliminate center back seam, stitch side of neck band, turn inside out, pin neck band seam to inside collar area, fold neck band over and pin to outside (encasing seam) and stitch
Bottom seam
Sleeve seam

And the result was well-thought out (I thought!) but hideous.  Short in length and shapeless.  Disappointing to say the least.


I can’t see giving this another go.  But the view A does look cute.  Guess I’ll check out the reviews for that one and see some finished products before I write this pattern off completely.


Sunday, January 26, 2014

Simplicity 1805--A T-Shirt for Me Shirt


Simplicity 1805
Stretch knit shirts, variations


I made view B, but with the sleeves of view C, since I wanted a shorter sleeve look.
I used this great thin knit that I’d picked up on some insane clearance at Hancock Fabrics (I think), and bought out the rest of the bolt, which wasn’t much, I had 1 1/2 yards of 56” wide fabric to work with.  And I ended up with some leftover.

Previous reviewers mention that this pattern runs large, that must be why they put such sizes like XS and XXS in this envelope.  So I cut an XS for the top’s neck and sleeves, and switched to S at the “waistline” marking.  


Back view


I like that the sleeves are attached to the shirt front and back, because I really didn’t want to have to fight with the gathers again so soon after my last shirt project.  I didn’t like the neck band instructions.  My oh my I had to fight with stretching that collar!  At this point I am not at all sure I followed the instructions on this, but I did manage to get it on.  I stitched the raw edges together (which was the hardest part) on the inside of the shirt, but then pressed the neck band up and over to encase the raw edges and topstitched the finished edge to the shirt outside.  (Confused yet? I’m not great at conveying this!)  This was so that the weight of the layers would fall forward on the neck line and not turn or twist inward—an occurrence that causes me some irritation for sure.  I also skipped the interfacing step for the neckband, after reading other reviewers experience with this, I found it was not worthwhile to interface anything.

The only other change I made was to put the elastic on the side seams last.   I wasn’t sure if I’d want it, and honestly, the shirt looked fine without it, but I slept on the idea, and decided to go ahead.  But, instead of sewing the elastic directly onto the shirt at the side seams, I decided my thread would show through too much, and not wanting that, I sewed the elastic to the front facing side of the French side seams instead.  It seems to have worked OK, and the gathering effect is there.  


I did like the few pattern pieces, the simple instructions, and it is a pretty quick sew.  Just watch out for that danged neck piece that requires a crazy amount of stretching to fit.  I might sew it again, not sure, for some reason printed knits (in my price range, especially) are hard to find around here.  I like the look of view F, with the open shoulders, but would like a wider set neckline with that….we’ll see.


Simplicity 1540--Grey Fleece Coat


Simplicity 1540

Misses Jacket in two lengths with collar variations


I made view A in size 8 out of some fleece blankets I picked up before Christmas at Walmart, 2/$5. 
               
It seemed like this project had a lot of steps, though the pieces went together quickly, until I got stuck. The first half of the instructions were fine, but I remember reading and re-reading one step of the collar, for some reason I just wasn’t getting it.   Then on step 34 I figured enough of this basting nonsense, I’m stitching (because they never go back and stitch it!).  But the most confusing part to me was that of the sleeves.  Step 40 doesn’t even look like it goes with the drawing, and doesn’t make sense.  And after reading the paragraph of step 42 time and time again, I had to step away for a while.  Then come back, ignore the directions and work out the following so that it was reasonable (to me): sleeve cuff--on outside of sleeve, place cuff right sides together so raw edges meet, stitch at 5/8” and again at 1/4” from seam.  Turn.  Trim inside cuff seam along stitching, press seam up, turn outside again, top stitch 1/2” from seam on sleeve (not cuff).  This was so that I can catch the seam in the top stitching. 

The only actual change I made to the pattern was to shorten it, I used a length about halfway between the cut lines for the shorter jackets and the longer ones; about 29 inches from base of neck to bottom hem in back.

Oh, I also learned that the type of fleece I used had a bit of stretch to it after all, and it really was a good idea to practice the button holes before putting them on the jacket itself-they would have been way too big!  I made a few on scrap and threw out the measuring rules of thumb on button size vs. button hole, because the holes would just stretch out, and figured it by trial and error. 


I really like the finished product though!  It’s the best jacket I’ve ever sewn, (including that one other one I did) and I might make another version of this again some time.  Maybe a shorter version of the same jacket, or maybe even the shawl collar one.
For now it is just too cold to wear it, but I have something nice to look forward to when the weather starts to warm a little, for now, it's parka time!


New Look A6891--Flowy Sheer Shirt


New Look A6891


*Easy
Flow-y shirts with sleeve variations from long sleeved to sleeveless.
I made view C, size 10
View C in that size calls for 1 5/8 yards of 45” fabric, however, I completed this project with 1 1/2 yards of 38” fabric and had some pieces left over.  The caveat is that I didn’t use all of the pieces, I omitted #6, the neck binding/tie piece.

Yes, it was fairly easy to sew, only 3 pieces to cut out (4 if you included the one I didn’t), and like other reviewers, I cut the front on a fold to avoid a front seam.  I had planned to do this for the back as well, but ended up cutting the side seam on a fold (too many distractions I think) and had to remedy that (oops).  So my back does have that annoying center seam, made even more obvious by the fact that my material was see through.
But that aside, I didn’t really follow the directions, because it was so easy to see how it would all go together.  This was my second try at French seams, and I’m loving them.  Can’t figure out if they are safe for sleeves though, or in this case, sleeves with those gathers in them, so I did the old press seam open, fold each side half way in, press together and stitch enclosing raw edges.  This was the most annoying step because getting all of the gathers to cooperate was an exercise in patience.
Instead of using the neck binding strip, I simply made a rolled seam at the neckline.  I did put in the basting stitch at the beginning so that I could gather, and made sure those ends were still accessible after sewing the neckline, then pulled them to gather and tied them off.  Not sure if this was a smart way to do it, but time will tell.


I like it OK.  It’s nice and flow-y, and a light-weight shirt to help keep the sun off my shoulders when warm weather returns.  Thank goodness for the front gathers, though, otherwise it would have been a total bag.  Glad to have found a use for this fabric that I’ve had for a long while, and to have tried out this pattern, which has had my curiosity for some time.  I’d say it’s about a 50/50 shot that I’d sew it again.  Well, maybe 40/60.


Simplicity 3568--The Cotton Tunic Shirt


Simplicity 3568
Easy to sew
Tunic length top, I made view A in a straight 10.
I wanted something to wear with my new black knit pants, that are sort of like leggings.

It really doesn't look like much from the front...scroll down for more photos though.
 
It was an easy pattern, at least it should be and should have been, but that is my own fault.  I chose this opportunity to try out French seams.  I looked it up, got directions, wrote it down and had them by my side.  Somewhere along the way, things got muddled, and I ended up sewing the wrong sides of several pieces together.  Sooo….pick pick pick out those stitches.  Lesson learned.  From there it was smooth sailing…almost.  I got to the point of putting on the neck facing.  I had already decided that my cotton was sturdy enough to skip the interfacing and attached the piece.  It looked dreadful.  I couldn’t get it to lay flat.  So, I top stitched it down.  Still, it irritated me.  Tauntingly poking up here and there, and even showing from underneath (especially those bunchy curved edges on the un-attached side).  I couldn’t take it anymore, and once again, befriended my seam ripper.  Whew, that felt better already.  I guess what I’m trying to say is, I finished the neck line with a rolled seam, and am done with *all* neck facing pieces for the entire foreseeable future.

Evil neck facing piece, after being ripped out.
Neckline w/o stupid facing piece.

I also finished the slits in the bottom by ignoring the directions and just doing what made sense.  Not real wild about the placement of the darts in the front, I think I’d like them more if they were at an angle instead of seemingly straight across.  It seems it would be more flattering this way.

Overall, I think I’m going to like this piece alright.  The fabric is still a bit stiff, but more washings will help that I’m sure.  I might try view C, with the cowl neck, since that is what I originally got this pattern for, but for now I have some other projects waiting.


Saturday, January 25, 2014

Basic Cinnamon Swirl Coffee Cake


After meaning to make some coffee cake for months I finally got a recipe and had at it.  This is based on the one online from King Arthur Flour's website, and is pretty good for a basic coffee cake recipe.  Though I am hoping to get some inspiration from you folks in terms of ways to jazz it up!  Something with fruit or jam?  If you have a recipe, please share it!

Basic Cinnamon Swirl Coffee Cake


This coffee cake is broken down into three components, the cake, the topping, and the filling.

Cake Ingredients:
3/4 C margarine, softened
1 t salt
1 1/2 C sugar
1/3 C brown sugar
2 1/2 t baking powder
2 t vanilla
3 eggs
3/4 C yogurt
1 1/2 C milk
3 3/4 C flour

In a large bowl, cream the margarine and the sugars
Add vanilla and eggs
Add yogurt
Add baking powder and salt
Add the milk and flour alternating
(1 cup flour, 1/2 C milk...)

Topping Ingredients:
2/3 C sugar
pinch salt
3/4 C flour
1/2 T cinnamon
4 T softened margarine

In a small bowl, add margarine
With a large fork add remaining ingredients and press together
(Or using your hands, rub the ingredients together)
Until they resemble coarse crumbs or wet sand
Be careful not to over-mix, or you will end up with hunks that are more work to break apart

Filling Ingredients:
1 C brown sugar
1 1/2 T cinnamon

In a small bowl, combine with a fork until evenly dispersed

Grease a 9 x 13 baking pan (flat cake pan)
Spread one half of the cake mixture over the bottom of the pan, using a butter knife or rubber scrapper to smooth it out
Sprinkle the filling evenly over this
Drizzle the remaining half of the cake over top and gently shake the pan to level it out
Using your fingers, sprinkle the topping on top as evenly as you can, and gently press into the cake batter

Bake at 350 55-60 minutes, mine was done at 56 mins on the center rack.
Topping should have a golden brown color.

Enjoy!  But don't forget to let it cool for a few minutes before you dive in :)


Thursday, January 23, 2014

A Little Something for the Kitties


I don't know if I've mentioned it before on this blog, but, we have two cats, who happen to be polar opposites but manage to get along just swimmingly anyhow, and these two cats are spoiled with affection.  Now I'm not saying we drip and drool over them all day or all night long, but they are very well taken care of in terms of appreciation and love. 


This was the inspiration for a fun Christmas project for them, since their little socks were empty (already have too many toys) and one of them would have gotten a lump of coal anyway.  A cat tree!  For the climber and for the cuddler.  I put this one together for less than $20, with some luck coming my way, that is. 


I used 1 x 3 furring strips (2), one OSB sheathing board, a can of mismatched antique white paint from Sherwin Williams, and 4 yards of bamboo cotton soft fabric.  Tools: paint brush (included in $20 b/c I needed one), jig saw, sander (it's new, I'm trying it out), drill, hammer, nails-screws-washers*


*for use in keeping the fabric from twisting while I screwed in the top screws into pre-drilled holes, through the fabric.  Snip a little hole in the fabric over the screw hole (easiest to feel and mark with a pin), exchange the pin for a screw, slip over the washer (make sure it is big enough to slip off around the head of the screw, we don't want to leave it there) and press down onto the fabric so that it is away from the screw and pressed tight against the board, now drill your screw in, and slip the washer over the head-done.


What do you think?  One cat has already staked out the top shelf, but it wasn't the one we thought who would...

Thursday, January 16, 2014

Giant Peanut Butter Cookies


Yes, it may seem suspicious that my last post, months ago, was on Absinthe, well, no I/we did not go 'round the bend or anything, in fact, we haven't gotten around to trying the beverage what with the holidays and everything.  So, in order to get back on track, I am posting a new recipe for these amazing giant peanut butter cookies.

I've never cooked cookies this big before, and if feels like a royal victory to have them turn out just right on the first try.  They are reminiscent of the traditional criss-cross cookies, but come out nice and chewy, rich and full of peanut butter-y goodness.


Here is my recipe:

Ingredients

2 1/2 C flour
1 t baking powder
1 t salt
3/4 C margarine
1/4 C shortening
1/4 C molassis
1 1/4 C creamy peanut butter (don't skimp too much on the quality, Jif was great!)
2 t vanilla
1 C packed brown sugar
1 C sugar
2 eggs

Method

First, melt the margarine and shortening and allow to cool for a few minutes
Preheat oven to 350 degrees
In a large mixing bowl, place
  • Margarine, shortening
  • Brown sugar
  • Sugar
Cream, Add
  • Vanilla
  • 1 egg
Cream, Add
  • 1 egg
  • Molassis
Cream, Add
  • Baking powder
  • Salt
  • Peanut butter
Mix well, Add
  • 1 Cup flour, mix then add
  • 1 1/2 Cups flour
On greased baking sheets (I prefer silicone sheets on top of mine, or you could use parchment paper)
Use two spoons to scoop out a somewhat heaping tablespoon of dough (one spoon to scoop, other to release the dough from the spoon onto the sheet), placing the dough about 2 inches apart from each other.
Using fingertips round out the edges so there are no hunks jutting out (don't worry, the rustic look is great!)
With a bit of extra sugar and a fork, go to work making the criss-cross on the tops of the dough balls, dipping in sugar after each press.
Press down to flatten gently, until about 1/4 inch thick and mostly even in thickness


Bake in the center of the oven for 13 minutes, or just until set and the bottom is golden brown (at this time the very edges might turn a slightly deeper golden brown too, and then they are done).
 Allow to cool on the sheets for 5 minutes and transfer to a cooling rack, or plate in my case.

 
Take to work, win high praises from those who eat them!

Makes about 3 1/2 dozen large cookies.


Sunday, October 13, 2013

Absinthe Adventure--coming soon


I know that in the USA, the allowed about of thujone is very little, however, since this bottle was bought abroad, I wonder if the amount is increased?  If anyone knows, I am curious about this.

What I've learned so far about the contents of this bottle:

The armoise (Artemisia Vulgaris) infusion gives Absente its structure.
The alcoholate and essences add subtile flavors of anise, mint and spices, giving Absente its balance, elegance, freshness and surprising length of flavor.

 Drinking Absente:
 You can pour the Absente onto crushed ice or ice cubes.
 If you like strong drinks then you can drink it neat.
 If you prefer it slightly bitter and less sweet, simply add fresh water to your Absente.
Those nostalgic for the past can practice the ritual of bygone days by placing a sugar cube onto an absinthe spoon placed on the rim of the glass and slowing pour in the water until it melts the sugar and turns the Absente an opalescent green.
Absente can also be flambéed and added to cocktails.

Organoleptic profile:
The color: a beautiful light green with clear shiny glints of yellow.
The nose: a subtile aroma of absinthe blended with anise, mint and spices.
The mouth: round aniseed attack moving onto a well-structured feel thanks to the presence of the amoise, finishing with the fresh, spicy notes (absinthe, lemon balm and mint) which give Absente its length of flavor
Storage: at room temperature, not above 25°C or keep chilled. Store the bottle upright. No use-by date.
- See more at: http://www.distilleries-provence.com/en/produits/absente-55-alcvol-70-cl#sthash.NeFXiZaO.dpuf

 More on ingredients:
Absinthe is traditionally prepared from a distillation of neutral alcohol, various herbs, spices and water. Traditional absinthes were redistilled from a white grape spirit, while lesser absinthes were more commonly made from alcohol from grain, beets, or potatoes. The principal botanicals are grande wormwood, green anise, and florence fennel, which are often called "the holy trinity."   Many other herbs may be used as well, such as petite wormwood (Artemisia pontica or Roman wormwood), hyssop, melissa, star anise, angelica, peppermint, coriander, and veronica.   ---This according to Wikipedia:  http://en.wikipedia.org/wiki/Absinthe

Tasting notes will follow once I figure out how to make sugar cubes!!  Watch for that post coming soon!


The armoise (Artemisia Vulgaris) infusion gives Absente its structure.
The alcoholate and essences add subtile flavors of anise, mint and spices, giving Absente its balance, elegance, freshness and surprising length of flavor.
For drinking Absente there are no rules (or very few):
 You can pour the Absente onto crushed ice or ice cubes.
 If you like strong drinks then you can drink it neat.
 If you prefer it slightly bitter and less sweet, simply add fresh water to your Absente.
 Those nostalgic for the past can practice the ritual of bygone days by placing a sugar cube onto an absinthe spoon placed on the rim of the glass and slowing pour in the water until it melts the sugar and turns the Absente an opalescent green.
Absente can also be flambéed and added to cocktails.
Organoleptic profile
The color: a beautiful light green with clear shiny glints of yellow.
The nose: a subtile aroma of absinthe blended with anise, mint and spices.
The mouth: round aniseed attack moving onto a well-structured feel thanks to the presence of the amoise, finishing with the fresh, spicy notes (absinthe, lemon balm and mint) which give Absente its length of flavor
Storage: at room temperature, not above 25°C or keep chilled. Store the bottle upright. No use-by date.
- See more at: http://www.distilleries-provence.com/en/produits/absente-55-alcvol-70-cl#sthash.NeFXiZaO.dpuf

Sunday, October 6, 2013

My Kind of Chicken Soup


I know I won't be popular if I say that I just don't like chicken soup.  I never have.  I know I won't be high on your list, but it is what it is.  So, the task at hand for me tonight was to create a chicken soup that I do like, and, well, I've done just that by adding a simple twist in flavor.

This is not your ordinary chicken soup, but it is not a highly active recipe, I assure you.  It has many of the traditional ingredients, and is an all-round healthy soup too.  What sets my little soup (experiment) apart?  Three little ingredients, that when combined give it an entirely different level of flavor: ginger, fresh basil, and yellow curry.  (Of course there is garlic and onion in there too, can't make a thing without them!).

This recipe is scaled for two, having two bowls each.  Pair it with bread and you are all set to combat the cold and flu season (I've heard ginger and garlic are both really good for colds).

Yeah, the picture does not do this soup justice.  But the flavor will keep you coming back for more!

Ingredients List:
2 carrots, peeled
3 stalks of celery
1/2 medium onion
5 cloves of garlic
3/4" (squared) ginger, peeled
1 C fresh basil
1/2 C slow cooking (not instant or fast cooking) brown rice
1 chicken breast, cubed into half inch pieces
1-32 oz box PLUS 1-14.5 oz can of chicken broth
1 t black pepper
3/4 t yellow curry powder
1 1/2 T cooking oil

Making the Soup:
This can be done in either a stock pot or a skillet with high sides, so long as it gives you at least 3 quarts of room to work with.
         Prep work:  cube the chicken into half inch pieces
                           chop the celery and carrots every 1/4 inch
                           rough chop the onion and same to the basil
                           press the garlic
                           mince the ginger
In your pan or pot, heat oil (1/2 T), and saute the carrot and celery pieces until carrot is softened (approx 5 mins on med. heat), transfer to a bowl

Add remaining oil (1T), and saute the chicken, garlic, onion and ginger until the chicken is just cooked and slightly browned

Return the carrot and celery that was set aside, add the black pepper and stir until heated on medium heat

Add the basil and the curry powder and stir to coat, simmering for a minute or so to release the flavors

Add the chicken broth, stirring, and bring to a boil

Add the brown rice, stirring a bit, until it boils again

Cover, and reduce heat to a simmer for 50 minutes to an hour.  At this time, take a taste, adjust seasoning if necessary, and make sure rice is done to your liking (the rice I used required 50 minutes of dimmer time).

You can cover and simmer away until dinnertime, though your rice may start to fall apart if it's a while off, or serve now with a nice crusty bread.


And since the mister is down with a cold right now-a real nasty one-he has attested that this is one dish he can actually taste.  Being the traditionalist he is when it comes to chicken soups-insisting that they have butter and dill in them-he did give this one the thumbs up too, so I guess I'd better post it so I can remember what I did right...for next time.


Saturday, October 5, 2013

McCalls M6571, Boatneck knit shirt


Guess I'm looking forward to autumn.  Really looking forward to it, in fact, because I am so done with these days in the upper 90's with humidity through the roof.  No rain, no breeze.  Just mosquitoes.

I had a bit of a mishap today, when I was out watering the front plants in the "cooler" morning.  I had just filled up my first watering can full of water when I felt something poking me on my foot.  Because the grass is hard and pokey and now quite stiff and dry I didn't give it another thought, beyond that initial split second, that is, for when I took another step I noticed it got worse, and glanced down, sure enough, a wasp was having it's nasty fun stinging my foot.  I peeled it off and finished it with a trowel.  (Yeah, I'm really a peaceful person who enjoys rescuing geckos and anoles that wander inside, but this creature had it coming.)  Then of course was the swelling, the pain, blah blah blah.  It hurts.  So, I decided I needed a project that I can do a portion of sitting down, something that will give me a feeling of accomplishment without too much effort or frustration.  Some way to be productive.

Enter the McCalls pattern M6571.  I had been eyeing up this pattern for quite a while, in anticipation... 

Misses pull over knit tops with neckline variations.

I made view B, with the boat neck and the long sleeves.
I cut a size 10, and used a fabric that was on clearance about a year ago at Hancock Fabrics (pretty sure it was here and not Joannes).


 I really like the cut of this pattern, and surprisingly I didn’t have to take it in anywhere, which is surprising for my luck with tops.  I was looking for a boat neck pattern and this was the only one I could find that is sold in my area.

I’m not wild about having facing that can flop around and needs adjusting every time you put on the shirt, and I’m not pleased with how the shoulder area worked out with the facing, it didn’t seem to lay flat for me, like it had too much bulk in that area.

I also omitted the interfacing, steps 1 and 2.

The only issue I had was a cutting issue…I ran out of fabric.  Lucky for me this fabric has a pattern that hides horizontal seams very well.  Can you find it?  It’s in the sleeves.  It would have been fine if I had wanted 3/4 length sleeves, but I really wanted them long for this shirt.

Not sure if I would sew it again.  Though I do love boat neck shirts (as I believe I may have mentioned).  Guess I’ll wear this one a bit and make the call.  For now, I'll be sticking to pavement, cement, etc. until nature can once again get on board with the boundaries I thought we'd agreed on.


Thursday, October 3, 2013

Simplicity 1659, The Purple Crinkle Dress


I made view C, with the skirt of view D because I don’t care for the look of hi-low skirts.
The fabric I used was a lightweight crinkled part knit probably poly blend-my best guess.
I cut a size 10, pattern sizing was from 10 to 28W.


Issues I encountered:
The front came out 3 inches longer than the back (?); I accidentally put the zipper in for view D instead of view C so it doesn’t reach the top of the dress and didn’t realize it until much later; I found that the facing was annoying, and created a lot of bulk especially at the back center.

Fit like a big bag before some of these fixes
 Other:
I really didn’t understand the point of having such thin strips of facing for the straps, and could not bear to have them loose, just pressed under and under-stitched, so I tried tacking it down, discreetly, and that showed through as tiny pucker marks.  In the end, I said heck with it, there is a seam on the other edge of the strap, so I might as well match it and permanently have that facing down in place instead of flapping around.

The whole dress had some sort of fitting issues, especially the upper, and I was really worried that I wasn’t going to be able to pull it together. 

Overall:
I feel this dress came out OK, not great, but a good addition to the same old summer staples. The fit is just a half a shade off, the darts in the front seem too low and the bust area seems too loose overall-advice: cut a smaller bust if you are in doubt.

Tuesday, October 1, 2013

Ooh, Zucchini Flatbread with Jalapeno Kick!


Spicy Zucchini Flatbread Recipe


Looking for a creative way to use up some of those zucchinis?  I’ve got one for you!
But first, does anyone else have a hard time spelling the name of this lovely vegetable?  I always end up butchering it on the shopping list, thank goodness almost no one else sees it-the mister does, but he’s used to my quirks by now…all of them.

I can not remember when I first came across the recipe this is based on, but a few minor tweaks to make it my own, and here it is: a fabulous flatbread, ready to be cut into wedges for snacks, lunches, or as a fun side to dinner.  *For a mildly spicy flatbread, use only one jalapeno.

You will need:

1 8” zucchini (or enough for 1 cup shredded)
2 eggs (using the whites only)
2 jalapenos, large in size
1/4 Cup plain yogurt
2 T grated Parmesan cheese
1 C flour
1/2 t salt
3/4 t ground black pepper
1 t baking powder

To make:

In a larger bowl, mix flour, black pepper, baking powder, and salt
In a smaller bowl, beat the egg whites until soft peaks are made


In the food processor, process seeded and rough cut jalapenos to about a quarter inch pieces (you can also finely chop them instead), remove and place in larger bowl with flour mixture
In the food processor, process rough cut zucchini just a couple of seconds to acquire a shredded look to the pieces (you can also use a grater for this, more work, but I’ve done it), place this into the large bowl with the flour mixture and jalapenos


With a sturdy spoon, stir the large bowl so that the flour mixture coats the zucchini and pepper.


Add the Parmesan to the large bowl, stir
Add the yogurt to the large bowl, stir, it should be getting a bit moist and sticky here
Finally, add the beaten egg whites to the large bowl, gently, in a folding manner, until just incorporated

Spread evenly into a greased, round 8 inch glass pan and bake at 350-degrees for 45 minutes in the center of the oven.


Enjoy!
By the way, this works great with even a cheap Pinot Grigio...