Thursday, August 30, 2012

Sewing Project-3 tiered skirt


Simplicity Pattern #2414


Pattern Description: Misses Skirt

Pattern Sizing:8-16

Did it look like the photo/drawing on the pattern envelope once you were done sewing with it? Yes, except the waistband, which I did not use.

Were the instructions easy to follow? I didn't need them, for once!

What did you particularly like or dislike about the pattern? Nice flowing layers/tiers, very girly.

Fabric Used: Floral cotton.

Pattern alterations or any design changes you made: I really detest the waistband they decided to put with these pants and skirts, it's huge, bulky, unsightly and a waste. I make the yoke, piece #4, 2 1/2 inches wider, and make a rolled waste line with 1"wide elastic. Great fit, nice gathers, much happier.

Would you sew it again? Would you recommend it to others? I think one is enough of this particular pattern, since I'm not even sure how often I will wear it, it is a good conservative length though, sure, I recommend it.

Conclusion: Good enough.


Yes, I'm wearing slippers, and no, I won't be wearing that top with the skirt, it's just what I had on at the time LOL!


Country Style Pork Ribs and BBQ Sauce Recipes


Tender Slow Cooked Country Style Pork Ribs

In the past, I have tried making country style pork ribs, and they have never come out tender, juicy and falling apart, to my much disappointment.  I can’t tell you what I was doing, but whatever it was, the method was not working for me.  I almost threw in the towel, swore them off permanently, but then I got a craving for them…and so did the mister.  So, we picked up a package of boneless country style pork ribs, and I went to work.  Scouring the web for a method that was sure to deliver what I knew was possible, it had to be easy, but I didn’t expect just how easy it was to be.  For some reason, these are the things that seem to challenge me the most.  To date I have never made a batch of rice crispies treats that came out well.  Bizarre, eh?  Yeah, I know, I’m quirky.

Long story short, what I found on the web seemed to be a consensus of cooking them low (heat) and slow (lotta time).  I wanted a slow cooker recipe, because I love my slow cooker and haven’t broken it out in a while.  So, here was my answer, simplistically: put a layer of onion slices in the bottom, on top of this put your pork ribs, cover with sauce, and let it cook on low for 8-10 hours.  OK, I thought, I’ll give it a shot.  One—last—shot.

Success!  The result was accurately predicted by those folks on the various websites I consulted.  The ribs were tender (!), juicy (!), falling apart (!).

  • I started the night before with a simple rub of garlic powder, onion powder, black pepper, very little salt and some ground thyme.

  • I also put a few pats of margarine in the bottom of the crock pot under the slices of onions…just because.

  • I covered the ribs with a watered down bbq sauce, reserving enough of the full sauce for coating at the end (when they were done).

  • My ribs were done in exactly 9 hours to perfection.

I did, however, also make my own sauce, which is really not that hard at all.  


Here are two versions of a BBQ sauce I make:

Version 1
1/4 C apple cider vinegar
1/2 C ketchup
1/4 C strong coffee
2 T finely chopped onion
1 T minced garlic
1 T margarine
1 T molasses
1 T mustard
1 T brown sugar
2 t Worcestershire sauce
1 t paprika
1 t chili powder
1 t oregano
1 t thyme
1/2 t salt

Directions:
Sauté onion and garlic in margarine for a couple of minutes in a med. sauce pan
Add all other ingredients
Combine, bring to a low boil, bring to a simmer, stir from time to time

Makes about 1 1/2 Cups

Version 2
(This is just version 1, simplified)
1/4 C apple cider vinegar
1/2 C ketchup
1/4 C strong coffee
2 T finely chopped onion
1 T minced garlic
1 T margarine
1 T molasses
1 T brown sugar
2 t Worcestershire sauce
1 t black pepper
1 t oregano
1 t thyme
1/2 t salt

You can also substitute 1 t of onion powder for the onion and 1 t of garlic powder for the garlic, to taste, of course, in this version without hurting anything

Directions:
Add all ingredients to a medium sauce pan
Combine, bring to a low boil, bring to a simmer, stir from time to time

Makes about 1 1/2 Cups

Crazy-Easy Cinnamon Bread


Crazy-Easy Cinnamon Bread

The day came when my car was in the shop, but I wanted to make a dessert-y thing that would also be portable for the mister to take to work AND double as a breakfast or snack.  The kicker of the situation was...I had one egg and very limited ingredients.  Solution: this delicious, cinnamony, soft, delightful cinnamon bread.  It is very easy to assemble, and quick too (as you can guess from my other posts-this is a big plus for me), and of course most importantly, it is a very good cinnamon bread.  This is my go-to recipe, and is great to make and take in to work to share with your co-workers at morning break.
Mmm, moist cinnamon raisin goodness!


Ingredients:
2 C Flour
1/2 C sugar
1/2 C brown sugar
1 t baking soda
1 egg
1 C buttermilk*
1/4 C vegetable oil
1 1/2 t cinnamon

Layer Ingredients:
1/2 C raisins
1 1/2 t cinnamon
1 T sugar

Method:
Preheat oven to 350 degrees
Grease the bottom and sides (halfway up) of a 9” loaf baking pan
In a large mixing bowl, combine sugars and egg and beat them to combine well
Add oil and cinnamon, combine
Add buttermilk*, combine
Add baking soda and flour, combine until evenly and well mixed by mixer
In a small separate bowl, combine raisins, cinnamon and sugar, toss to coat
Add half of the wet mixture to the prepared baking pan
Evenly distribute the raisin mixture over the top of this
Top with the other half of the wet mixture
Optional—take a butter knife and swirl around the loaf deep enough to mix up the raisins with the batter, but not too much, I didn’t do this as you can see in the pictures, I was lazy.
Bake for about 55 minutes
Remove from oven and cool completely before trying to remove the loaf, which is best assisted by using a butter knife and loosening the edges, then there is easy removal.


*I never, ever have buttermilk on hand, but I use the old handy cheater fix of adding regular white vinegar by these proportions: 1 teaspoon of vinegar per 1 cup of milk.  Easy!


Enjoy your beautiful cinnamon bread!


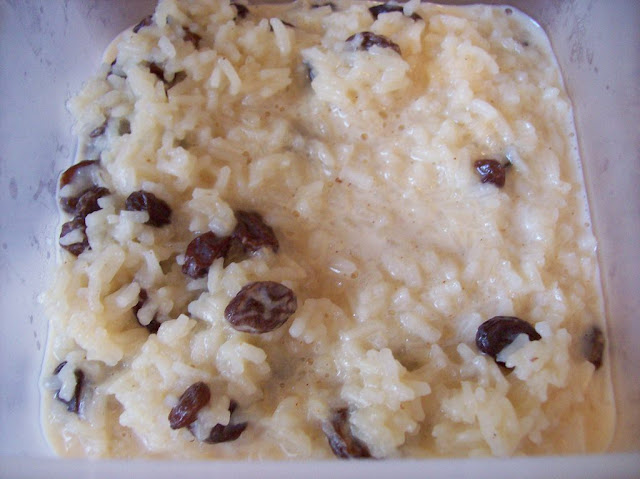
Rice Pudding with an Almond Twist


Here is a great little recipe with few ingredients that will let you whip up a dessert in no time!  This makes 3-4 servings, or 2 really big servings as was the case with us haha.


Ingredients:
1 C instant rice (minute rice)
1 1/2 C milk
1/2 C sugar
1/2 t salt
1/4 t cinnamon
1/4 C raisins
shot of flavored creamer (~1 T.) amaretto flavor recommended

Method:
In a small to medium sized sauce/boiling pot, mix all of the ingredients together
Bring them to a low boil, stirring for 2 minutes
Reduce heat to medium, cover and let sit for 10 minutes
Stir, serve warm or cold, as is, or with extra milk added-to your liking

Enjoy!


Junior Anoles are Here

The second of their twice-a-year hatch must have happened right under our noses this year, because we've both been spotting these cute baby(junior sized really) anoles around the house porches and plants.  Aren't they just adorable?  This little guy had just been victorious in claiming some food.  Hey, the more of these guys out there eating up the bugs, the better in my book.


Don't bother me....I'm blen-ding!


Saturday, August 25, 2012

Swatch Winner

Since absolutely no one weighed in from out there in internet-land, the decision was made by myself, after careful consideration and some consultation with the mister.  No one was informed of my choice until I brought the fabric home...and the winner of becoming the new covering for the settee is....

Next up, dismantling the settee: removing the old covering, and repair work.


Wednesday, August 22, 2012

Chocolate-free Homemade Baileys Irish Cream

At this point, I'm still not brave enough to try chocolate...but I had this birthday cake idea...to make a bundt cake with Bailey's Irish Cream in the cake, in sponged onto the outside, and in the frosting.  Oh, and honestly, I was looking forward to having some left over for sipping as well.  But how to make Bailey's without chocolate?  Perhaps you haven't met my newest little friend: Watkins Imitation Chocolate Extract.  It's affordable and versatile.  Here is the recipe I came up with...

1 C Half and Half
1 14oz can of sweetened condensed milk
1 1/2 C whiskey  (I used TW Samuels, TN whiskey=cheap)
2 t coffee
2 T chocolate extract (could use chocolate syrup here)
1t vanilla

Whisk, blend, stir, combine well before serving, each time.
Delicious!!  Marvelous substitute!!

I added powdered sugar to it for frosting, easy.
Makes about half a pitcher full.

Enjoy~


Hey Blondie!


Yep, I was a blond for years, not anymore (partly because I'm allergic to formaldehyde), but that’s not what I’m talking about today.  No, today the focus is on blondie brownies, made completely chocolate free (as I am not yet allowed to have chocolate).  But, for anyone who is resourceful, there are ways to be found around this, and in the end, you’ll find a very versatile recipe, with any number of options for tweaking.  Hope you enjoy it as much as we have. 

Oh, I forgot to mention, this is extraordinarily easy, and you’ll probably have everything you need to make these blondies in your fridge and pantry already.  If you are feeling lazy/pressed for time/don’t have powdered sugar or for whatever reason you don’t want a frosting, simply increase the brown sugar by 1/4 cup and you’ll be satisfied with the level of sweetness. 

Tweaking options:
Use chocolate extract in the mix.  And maybe peppermint extract in the frosting for chocolate/mint!
Nuts!! Add 1/4 cup chopped for some crunch.
Baking chips, although you might want to toothpick test for doneness, and may extend the baking time to 35 minutes.  Not sure, haven’t tried this one.  Same with peanut butter.


OK, here is the base recipe I’ve been working off of…for an 8 x 8 pan, I used glass

Ingredients:
1 stick margarine, softened
3/4 cup packed brown sugar
1 large egg
1 t. vanilla extract
1/4 t. salt
1 t. baking powder
1 C flour

To Do:

Preheat oven to 350 degrees
Grease 8 x 8 pan bottom and 1” up sides
Mix margarine and sugar until well blended (~30 second w/ hand mixer) in a med. bowl
Add vanilla and egg, mix until dispersed
Add baking soda, salt and flour and mix until incorporated evenly (~1 min.)
Scrape bowl contents into pan


Bake for 30 minutes on the center rack
Top should be a lovely golden brown and slightly raised in the center if not evenly raised
Cool in pan


Pretty nice and blond, eh?  But wait!  There’s more…


Fake Chocolate Frosting
(For spreading or piping)
Ingredients:

1 1/4 tsp. light margarine, melted and cooled
1/2 t. imitation chocolate extract
1 t. milk (I use 2%)
1/2 C powdered sugar

Add extract and milk to melted margarine, stir, add powdered sugar (thin with milk if desired)
Today I felt industrious, and decided upon the good ole plastic bag method of piping.  I had a bit left over, though.  It makes about 1/2 cup of frosting.


And here is the finished product.  Simple, easy, quick, and no extravagant ingredients (yes, the imitation chocolate extract may be more difficult to find, I got some in Wal-Mart recently though), and most importantly...tasty results!


Another great thing about making this portion size, after we've had this for 3 desserts, we'll be tired of it, and ready for something else.  Enjoy!  Let me know of your creative alterations/combinations.

Friday, August 17, 2012

Moist, Delicious Carrot Cake


This is a great way to get more vegetables in your daily meals…put them in the dessert now and then.  Here is a recipe for a delicious, moist carrot cake that I’ve been making for a while.  It’s very easy, and pretty quick to assemble.  Cream cheese frosting is the natural choice, and I use the same recipe as I do for frosting cinnamon rolls, thickening with extra powdered sugar if needed/desired/based on the temperature of this hot summer.
Makes a two layered 9 inch cake, but can easily be halved if you want a smaller cake.


Ingredients:
2 C. carrot
1 1/3 C flour
2/3 C brown sugar, packed
2 t baking soda
1 1/2 t baking powder
2 t cinnamon
1/2 t ground cloves
1/2 t allspice
1/2 t nutmeg
1/2 t salt
2/3 C vegetable oil
4 eggs
1 1/2-2 C nuts-pecans, walnuts (either)

Method:
Preheat oven to 350
Butter and flour two 9 inch baking pans
In a food processor, process carrots until finely grated consistency, set aside
Process nuts until finely chopped, set aside
In a large mixing bowl, combine eggs and brown sugar, mix with a hand mixer
Add oil, mix
Add spices, mix
Add baking powder, baking soda and flour, mix
Add carrot and nuts, mix
Divide into the pans with equal proportions
Bake for 30 minutes, toothpick test
Cool completely before frosting


Always gets rave reviews!  Always gets eaten up!


Tuesday, August 14, 2012

Refinishing Chronicles…The Stand Mixer


Ebay is a wonderful tool, you can find nearly every whim or trifle there, it brings together people with a want or a need of something and those who have a want or need to be rid of something.  I wanted a vintage stand mixer.  Something with character, something sturdy with a good name behind it, and something used-because the new ones are far, far, far too expensive.  And since its an indulgence, who knows how it will fit into my culinary lifestyle?  I had narrowed down my search early on; it had to be a Kitchenaid.  Then, it had to be a Hobart Kitchenaid.   How much power did I need?  Well, everyone says “they don’t make them like they used to,” and then proceed to go on and on about how their Kitchenaid mixer could blend cement for building materials or some such great feat, so that set my mind at ease about the power issue.  Color was the next big thing.  White?  So boring.  Blends, I suppose, but I’m more of a bright in the kitchen kind of gal.  Black?  No, same reasons and too modern.  Red?  Hmmm.  Nah, too popular, and I don’t want a red-heavy kitchen.  And then it seemed that all of these questions were answers when I stumbled upon this neglected beauty:


How awful!  How simply hideous, but since you have a hard time taking your eyes off of it…what does that say?  I became enthralled.  Green, refreshing, citrus, bright, clean and fun.  So different than any I had seen thus far.  This was the one.  Excitement followed, after winning the item in a neck in neck bidding fight, relief, than anticipation…for the newest member of the kitchen family to arrive.
It finally did, in a clumsy, flimsy box, wrapped in paper and rattling around.  I was relieved that it did, in fact, still work after all of that.   I unwrapped it, to find:


What the heck?  This was not my mixer.  This was not my wonderfully hideous much awaited addition.  What was this bland, pale green imposter?  I checked it over.  Scratch by scratch.  It was the same mixer as pictured.  Just a few (very important!!!!) shades of green off.  What a disappointment.  And to top it off, it was filthy.  It took four hours of scrubbing years of dirt and grim from it’s many crevices and parts to get it reasonably clean.  The seller was definitely knocked down more than a few rungs in my esteem although I never got to rate them.  Fraudulent, it how I feel toward them.  Anyway…I was not about to let my dreams be crushed by this blatant misrepresentation.  Time to hatch a plan.  I must have my lime green mixer, I must transform this into my lime green mixer.

Step one.
Deep cleaning.  A toothpick and a paperclip were employed.  I don’t need to say any more.

Step two.  Prepare the mixer.  Painters tape and patience.  Plenty of patience.  And little tiny pieces of tape.  Removed the back cover, taped the tiny screw to the cord and bagged it.  


Step three.
Priming.  Four thin coats of primer did the trick.  Following the dry-time and interval instruction on the can.


Step four.
Sanding smooth.  Steel wool is one of those nails-on-a-chalkboard things for me, funny because nails on a chalkboard don’t really bother me, but I can’t stand to touch the stuff.  It’s awful.  So, the mister was employed for this step, and gave me a nice smooth surface to start the color process from.


Step five.
Green coats.  I think I lost count after five coats, there may have been more, I used pretty much the whole can, doing my best to ensure even coverage in thin coats.  It did start to sprinkle on me at one point, so I rigged up an umbrella and a chair to protect my little project until it was dry enough to move inside.

Step six.
Clear coats.  Four thin coats of Krylon gloss protective clear spray paint was the last step.  To do this I had to wait 48 hours after the last color coat had been applied.  This was the fastest drying and I was able to move it in about an hour without too much concern.

Finished mixer:


So, I think I did pretty good, eh?
It looks now like it should, and now I can all the fun I want with it!


Monday, August 13, 2012

Giant Spaghetti Meat Balls, What a Novelty!


Do you love spaghetti night?  Do you love meatballs?  Are you looking for something different, a statement, perhaps, an impression?  Well…look no further, I may have the solution for you!  We recently hosted a dinner for eight, and I decided to serve spaghetti, salad, garlic bread…the usual, but I needed some way to make it memorable for these hungry people.  Then it came to me-make giant meat balls.  I scoured the internet, in search of a reliable recipe, each time I was disappointed.  The balls were too small.  I wanted to go BIG.  At least a half pound each, free standing, holding together, perfectly browned, a giant ball of meat in the center of a pool of spaghetti on a plate.  And so once again, I traveled into uncharted territory.  Luck was once again on my side, because it was a huge success!  There are no pictures, as it was all consumed, you’ll just have to take my word for it, and be adventurous enough to try it on your own.  Here’s how I did it:

Ingredients:
3 lbs ground beef
1 lb sweet Italian sausage
1 C Italian bread crumbs
1 C plain bread crumbs
3 eggs
1 medium onion
1 large red pepper
1 bulb of garlic, cloves peeled, ends trimmed
~2 T Italian seasoning blend
~1 T garlic powder
~1 T ground black pepper
Olive oil for sautéing

Method:
In a food processor, chop onion, sauté in large skillet
Do the same for the red pepper
And the same for the cloves of garlic
Place in large mixing bowl
Add herbs and spices
Add meat, bread crumbs and eggs
Mix thoroughly with hands
Press flat into bowl, and divide into 8 equal sections
Compress each section in the palms of your hands to form a nice tight ball
Preheat the oven to 375 degrees
Working in batches (depending on the size of your skillet), brown each side of the balls
Set them on a foil covered cookie sheet when browned
Bake for 30 minutes, test for done-ness by sacrificing one and cutting it open to inspect
Perfect-o!  8 giant meat balls, beautiful!

How about it?  Want to try something of novelty next time you serve spaghetti?  This was really fun, and those fellas with the heartiest of appetites were completely satisfied.


Frozen Coconut Pie, Light, Cool, & Refreshing

It's summer, so how good does a cold, light, smooth dessert sound right about now?  Sounds good to me, and here's what else does: it's very quick and easy to make.  I've been making this for years, sometimes at the wonderment and request of a very dear old friend (with whom I refuse to fess up that it isn't a creation of mine, but a recipe from Kraft).  But, I shall share this pie-the recipe anyway-with you.


http://www.kraftrecipes.com/recipes/frozen-coconut-pie-51791.aspx

          Ingredients:
4oz.  (1/2 of 8-oz. pkg.) Cream Cheese, softened
1 T.  sugar
1/2milk
1 sweetened shredded coconut
1 tub  (8 oz.) extra creamy whipped topping, thawed
1/2 tsp.  vanilla extract
1 9" graham cracker crust
 
BEAT cream cheese and sugar in large bowl with electric mixer on medium speed until well blended. Gradually add milk, beating until well blended after each addition.

STIR in coconut, whipped topping and extract. Spoon into crust.
FREEZE 4 hours or until firm. Remove pie from freezer about 15 min. before serving. Let stand at room temperature until pie can be cut easily. Store leftover pie in freezer. 

I like to add maraschino cherries on the top, it give the dessert a special touch and tastes wonderful in combination.   


I also make my own pie crust, using Martha Stewart's recipe:
http://www.marthastewart.com/336402/graham-cracker-crust

It is quick and easy and can be done completely in the food processor.

Ingredients:
6 1/2 ounces graham crackers (12 crackers), finely ground (1 1/2 cups)
5T melted margarine
1/4 C sugar
1/8 t salt
 
For this recipe, I did not find it necessary to bake the crust as one normally would, and as directed by Martha Stewart's recipe.  But you can, if you like, and then wait for it to cool before proceeding.
 
Hope you enjoy this summertime treat!


Saturday, August 11, 2012

Treat Yourself to Spice Sugar Cookies

Try me, I'm so tasty!


The mister is a big fan of ginger snap cookies....I am not.  Something about them...they just aren't my cup of tea.  But we can both agree on these cookies, found on epicurious.com (http://www.epicurious.com/recipes/food/views/Spice-Sugar-Cookies-13176).  They are delicious!  Nice subtle flavors of molasses, cinnamon, ginger, and enough sweetness to be deemed part sugar cookie.  They are very easy to make, and putting together one batch of this recipe, including mixing time takes just over one hour (baking one sheet at a time).  I tend to skip the refrigerate part and just use chilled shortening instead.  They also bake up beautifully every time, and I've made them quite a bit when I'm in the mood for something different.  This is also one of my favorites because I had to do absolutely nothing to the recipe, it comes out great as-is.

See:

A handful are missing from the top of this pile...we can not resist!


Looks grand, eh?  Tastes grand, I assure you!


Wednesday, August 8, 2012

Vin Doux, Round 2


So, guess what I got for my birthday this year???  You may recall my earlier post expounding on the many unforgettable virtues of a particular wine that I had recently made the acquaintance of…Vin Doux.  Well, I must have been a very good wife this year, because I was well rewarded with not one….but TWO bottles of this beloved vintage!!  Lucky, lucky me :)  It is one year later than that which I fell in love with, a 2010, instead of a 2009, but, I am very much looking forward to just the right occasion or day to splurge on this baby. 


 Here is what Mr. Parker has said about the vintage:

Robert Parker - 90 points
"The 2010 Muscat 'Vin Doux,' a signature wine for the island, is reviewed from 750ml; it also comes in a 375ml size. This is often one of my favorite value choices from Greece. It hits another homer this year, mingling richness, sweetness and acidity into a beautiful whole. Simply a pleasure to drink, this is very well priced and utterly delicious. I think these can age, although their character will change as they do, but it is really hard to resist right now. Drink now-2020. "


And information from the vintner:

Region: Samos, Aegean Islands, Greece
Grape(s): Muscat

"An AOC wine made from extra ripe Moschato grapes. At harvest, the grape juice has a minimum sugar level of 221gr/lt. To balance the sweetness, the must is enriched before the onset of fermentation. The wine is matured in stainless steel temperature controlled tanks. A small quantity of wine receives oak barrel aging as well. The wine is golden in color with a harmonious bouquet of honey, apricot and honeysuckle. On the palate, it is soft, sweet and supple with medium body and moderate acidity. The finish is medium to long."


PERFECTION!!!

Tuesday, August 7, 2012

How to Make a Bamboo Trellis


This all sounds very organized, but it’s really like second nature, and you won’t even realize you are following steps, at least I didn’t when I decided to recount what it was that I did to make my trellis.  Sure, it's not perfect, but its functional and sturdy!


  • First, you need access to materials…check, bamboo grows in patches down here that spread by sending up new shoots in random parts of people’s yards. 
  • Take measurements-how much space do you want to cover.
  • Next, you need a plan…I felt like a schoolgirl drawing with my plastic ruler on some lined notebook paper I found.
  • Get your materials together, for a trellis 7 feet high and 4 feet wide, I used:
            (4) Length pieces, about 7 feet long
            (4) Metal stakes, at least 5 inches long
            (4) Cross pieces, about 5 feet long
            Twine/outdoor string
            2 nails
  • Lay the pieces out on the ground
  • Weave the cross pieces in front of and behind (alternating) the length pieces
  • Adjust the cross pieces to leave an even amount of space between them, I went with 16 inches
  • Tie in place at meeting points, wrapping both around each piece and cross-wise each direction for greater stability, test for slippage
  • Bring two length pieces together near their top and secure by tying
  • Pound outside stakes into ground at desired location
  • Set the trellis up and tie bottoms to outer stakes
  • Pound inside stakes and tie the same
  • Mark contact points of the top ties
  • Pound one nail each at that point into the surface it will lean against
  • Secure by tying the top at cross point to the nail on each side
Fin!

Step back and enjoy your creation, weave you plants through or plant something anew.

*This trellis is baby anole approved :)


Monday, August 6, 2012

Savory Yam Soup


This is something that I love making.  I love it for its simplicity.  I love it for its ease, and I love it for its earthy, light, savory taste.  If you have a food processor, this recipe goes pretty fast, and the soup is great if you keep it in the fridge for up to three days.  So grab a crusty French loaf and dive in (shhh, its very healthy too! And you’ll never notice that it’s low sodium).

Ingredients:
1 med-large yam
2 garlic cloves, chopped
1 T onion, chopped
1 T olive oil
2-2 ½ C chicken broth
1/2 t garlic powder
1/4 t ground thyme
1/4 t ground black pepper (or more, to taste)

Method:
Boil/Bake/Microwave the yam until tender all the way through, I prefer to cut mine into 1” thick slices and boil with the skin on, but whichever way works best for you, just so it is tender, and a fork slides in as easy as if it were going into butter
Remove skins when cool enough to handle


In a medium saucepan/pot, bring olive oil to a med heat
Reduce to low heat, add onion and garlic, sauté for about 5 minutes, until tender
Transfer yam pieces, onion and garlic to food processor and pulse to combine
Add approximately 1 C chicken broth, and process until smooth, adding more broth if necessary
Scrape yam mixture into medium saucepan/pot
Raise heat to medium, add remaining chicken broth along with garlic powder, ground thyme and black pepper
Stir and simmer for at least 10 minutes
Serve and enjoy!


*If you don’t have a food processor, mash the yam, and stir the broth in with a fork to evenly distribute.  You’ll also need to chop the onion and garlic very fine before sautéing, and sauté for less time.


Sunday, August 5, 2012

Pasta with Chicken, Cream Cheese, Red Pepper and Parmesan


This is one of those easy dishes that doesn’t take long to whip together, and makes great leftovers for lunch the following day.  I like it because it lets me incorporate a great trinity: cream cheese, red pepper and parmesan, something I discovered while making finger food for Christmas Eve one year, and it’s a staple for the holiday ever since-I’ll share it with you this holiday too. 
You may think that I am stuck on farfale noodles, I have to tell you, that just isn’t the case, it’s mere coincidence that several of my later recipes have included them, but I’m nearing the end of the box soon.  This recipe can be made with spaghetti noodles for that matter, but tossing the “sauce” and evenly coating the noodles would be more of a challenge, trust me, I’ve tried.  So, here it is, another farfale recipe, but I was pleased with it, and think if you made it you would be too.  This makes enough for two, with maybe a bit leftover for lunch the next day (for one!).


Ingredients:
1 chicken breast, boneless, skinless, cut into small bite-sized pieces (about 1/2 inch cubed)
3/4 C frozen peas
1/2 C parmesan cheese, grated
4 oz cream cheese (yes, 1/3 less fat variety works just as well)
1/3 C roasted red pepper, chopped
2 t olive oil
3/4 T dried parsley
1/2 t ground black pepper
1 2/3 C farfale noodles (about), uncooked

  • In a medium sauce/boiling pan, bring water to a boil and cook farfale noodles as directed, usually about 11 minutes              
  • In a large skillet, heat olive oil, and cook chicken pieces turning over halfway through (when chicken turns white up the sides of the pieces)
  • Season meat with 1/4 t black pepper
  • Set aside chicken when cooked through (test a piece)
  • Rinse and wipe skillet if you have any burnt residue
  • Add frozen peas, cream cheese, red pepper to skillet
  • While cream cheese softens, gently work it around to coat other ingredients
  • Add chicken, parsley, grated parmesan cheese, stirring to coat
  • Add noodles, one third at a time, coating, and the remaining 1/4 t of black pepper
Serve and enjoy!


Saturday, August 4, 2012

Simple, Moist Banana Bread


Who amongst us does not like a nice thick slice of banana bread every now and then?  Well, here is an easy and fast recipe to make it happen for you!  Perfect for breakfast or coffee break.  Moist and scrumptious....


Ingredients:
1 3/4 C flour
1 t baking soda
1/2 t cinnamon
1/4 t nutmeg
1/4 t salt
2 eggs
1/2 C vegetable oil
1 1/2 C mashed bananas (from about 3)
1/4 C plain yogurt
1 t vanilla
1/2 C packed brown sugar
1/2 C + 2 T sugar
1/2 C finely chopped nuts, pecans recommended

Method:
  • Preheat oven to 350 degrees                             
  • Butter and flour a 9 inch loaf baking pan
  • Peel and mash bananas, stir in vanilla extract
  • Chop or process nuts to desired consistency
  • In a large mixing bowl, combine sugars and egg, mix with hand mixer
  • Add yogurt and oil
  • Add baking soda, cinnamon, nutmeg, salt, mix
  • Add flour and mix well
  • Pour into baking pan


Bake for 1 hour at 350 degrees.
Delicious!!
Great take in to work treat too!


Thursday, August 2, 2012

The Great Swatch Debate

If there are indeed actual people looking at this blog at any point, and not just some automated searches generated by random webpages across the globe, here is your chance to weigh in....

I'm trying to decide on which upholstery to go with for the settee project, and have it narrowed down to the following three swatches.  Background: the room it is going to be in has main colors of green and white, with gold accents.

Number One
Concern: Love the neutral look, in case I decide to change the main colors of the room later on, but am concerned about it getting washed out next to white.


Number 2
Concern:  Just a shade darker than the green in the room, fine for accent, and the almost white design brightens it up and lightens it up, however, I'm concerned about locking into green forever.


Number 3
Concern: This green is a very good match, and the gold cross-hatching is nice too, my concern is that the pattern might be too small, and looking at the bench covered in this might be overwhelming.  Also, the additional locked in to green concern.

So, there you have it, I've eliminated dozens, have it down to three, and would appreciate your feedback, let me know what you think, which do you vote for? (and perhaps why?)


The Cellar, Then and Now: Sauternes


Sauternes is a French sweet wine from the Sauternais region of the Graves section in Bordeaux. Sauternes is made from Semillon, Sauvignon Blanc, and Muscadelle that have been affected by Botrytis cinerea, also known as noble rot. This causes the grapes to become partially raisined, resulting in concentrated and distinctively flavored wines.

After we married, over six years ago, we were turned on to Sauternes by a friend of ours, and we will forevermore be grateful for this.  In fact, for our first (or second, we can’t recall for sure) anniversary we indulged in this beautiful bottle:


2005 Chateau Villefranche Sauternes


Rating for France-Bordeaux-Sauternes: 96 (good year)
Type: Sweet
From: SAUTERNES, France
Variety: Semillon , Sauvignon Blanc , Muscadelle

The winery is in Villefranche Chateau Benoit Guinabert, Chateau Villefranche, 33720 Barsac, France.  It is highly ranked. One of the oldest estates in Sauternes, located on the plateau of Haut-Barsac, near the Ciron. The vineyards (Sémillon, Sauvignon and Muscadelle) has a wide variety of soils with a predominance of clay and limestone.
I remember it had a wonderful finish.


In the cellar now…and looking forward to:


Chateau Rabaud-Promis Premiere Cru Classe Sauternes 2001

Robert Parker's Wine Advocate: 90-92 points
Wine Spectator: 95 points

This is a big, sweet, honeyed Sauternes with loads of fruit, but not a great deal of complexity. Light gold-colored and full-bodied, with plenty of pineapple, honeysuckle, and marmalade notes as well as a hint of caramel, there is a lot going on in this young but promising 2001. Anticipated maturity: 2007-2020.

We are holding on to this one until our 10th anniversary!